Blogs
Blogpost
/ 18-6-2026
Van medewerker tot AI-agent: de nieuwe insider risks waar CISO’s nachtrust aan verliezen
Een agent die geen boetes uitschrijft, maar ze wel kan krijgen: bestáát die? Anno 2026 wel. Dat is namelijk precies hoe je een AI-agent...
 Ga naar Van medewerker tot AI-agent: de nieuwe insider risks waar CISO’s nachtrust aan verliezen
Blogpost
/ 17-6-2026
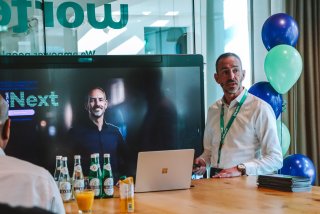
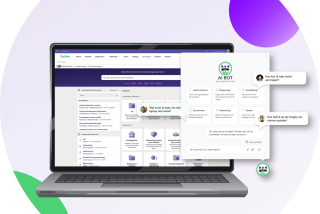
Microsoft Copilot Cowork
Microsoft heeft Copilot Cowork algemeen beschikbaar gemaakt (GA). Dat betekent dat Cowork vanaf vandaag beschikbaar is voor organisaties met een Micro...
 Ga naar Microsoft Copilot Cowork
Blogpost
/ 16-6-2026
API’s: het snelst groeiende aanvalsoppervlak en het slechtst in beeld
Wat we in onderzoeken steeds vaker zien, is dat binnenkomen niet meer het probleem is. In het API-domein zien we steeds minder technische exploit...
 Ga naar API’s: het snelst groeiende aanvalsoppervlak en het slechtst in beeld
Whitepaper
Whitepaper
Je Azure-kosten stijgen. Tijd om verder te kijken dan de factuur.
Veel organisaties herkennen het: aan het eind van het kwartaal blijkt de Azure-factuur hoger dan verwacht. Er wordt gekeken naar losse resources, onge...
 Ga naar Je Azure-kosten stijgen. Tijd om verder te kijken dan de factuur.
Blogpost
/ 11-6-2026
Zwakke schakel of ‘bewuste schakel’? Zó ga je als organisatie om met insider risks
“Wie vindt de medewerker de zwakste schakel?” Die vraag stel ik regelmatig wanneer ik een keynote geef. Vrijwel altijd steken meerdere men...
 Ga naar Zwakke schakel of ‘bewuste schakel’? Zó ga je als organisatie om met insider risks
Blogpost
/ 5-6-2026
Claude en Microsoft Copilot: waarom de toekomst van AI multi-model is
Veel organisaties herkennen dezelfde discussie. De ene afdeling experimenteert met Microsoft 365 Copilot, een ander team werkt liever met Claude en we...
 Ga naar Claude en Microsoft Copilot: waarom de toekomst van AI multi-model is
Whitepaper
Van reactief beheer naar voorspelbare werkplekken
Werkplekproblemen zijn vaak groter dan het aantal tickets doet vermoeden. Trage laptops, haperende Teams-meetings, applicaties die niet soepel werken...
 Ga naar Van reactief beheer naar voorspelbare werkplekken
Blogpost
/ 27-5-2026
Van datachaos naar AI-waarde: waarom governance het verschil maakt
AI kan organisaties helpen om kennis sneller te benutten, betere beslissingen te nemen en nieuwe manieren van werken mogelijk te maken. Van slimme zoe...
 Ga naar Van datachaos naar AI-waarde: waarom governance het verschil maakt
Blogpost
/ 26-5-2026
Waarom governance het verschil maakt in sterke IT-samenwerkingen
Techniek is belangrijk. Zonder stabiele omgeving, goede security en slimme inrichting kom je niet ver. Maar als een IT-samenwerking stroef loopt, zit...
 Ga naar Waarom governance het verschil maakt in sterke IT-samenwerkingen
Blogpost
/ 13-5-2026
Agentic AI inzetten in de industrie en zakelijke dienstverlening? Laat je inspireren door 5 use cases!
AI: de meeste organisaties hebben er al volop mee geëxperimenteerd. Inmiddels zijn we in een volgende fase beland: agentic AI doet zijn intrede....
 Ga naar Agentic AI inzetten in de industrie en zakelijke dienstverlening? Laat je inspireren door 5 use cases!
Blogpost
/ 13-5-2026
Innoveren met AI-agents én risico’s managen: hoe vind je de juiste balans?
De tijd waarin we voorzichtig experimenteerden met AI-chats, ligt achter ons. Dé nieuwe ontwikkeling: AI-agents. Steeds meer organisaties inves...
 Ga naar Innoveren met AI-agents én risico’s managen: hoe vind je de juiste balans?
Blogpost
/ 11-5-2026
Zó bouw je een AI-ready cloud: technisch fundament plus ‘transformatie-mentaliteit’
In de afgelopen tijd hebben organisaties volop met AI geëxperimenteerd. Er is flink in geïnvesteerd en inmiddels is het einde van de ‘...
 Ga naar Zó bouw je een AI-ready cloud: technisch fundament plus ‘transformatie-mentaliteit’
Blogpost
/ 7-5-2026
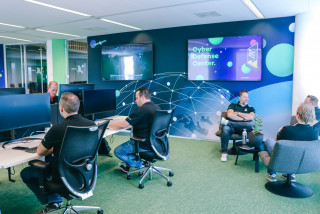
Security in 2026: regie is geen IT-vraagstuk meer
Cyberweerbaarheid is in 2026 geen puur IT-vraagstuk meer, maar een bestuurlijke verantwoordelijkheid. Met NIS2 en de Cyberbeveiligingswet moeten organ...
 Ga naar Security in 2026: regie is geen IT-vraagstuk meer
Blogpost
/ 7-5-2026
Hoe organiseer je 24/7 security in de zorg, zonder twaalf specialisten in dienst?
Zorgorganisaties moeten continu grip houden op cyberrisico’s, beschikbaarheid en compliance, terwijl een volledig intern SOC vaak niet haalbaar...
 Ga naar Hoe organiseer je 24/7 security in de zorg, zonder twaalf specialisten in dienst?
Blogpost
/ 4-5-2026
Van AI-experiment naar schaalbare oplossing: hoe neem je concrete stappen?
Steeds meer organisaties zijn klaar voor de volgende fase met AI. Ze hebben geëxperimenteerd met tools zoals Copilot of ChatGPT, de eerste minimu...
 Ga naar Van AI-experiment naar schaalbare oplossing: hoe neem je concrete stappen?
Blogpost
/ 4-5-2026
Hoe waarborgt een goede IT-aanpak de waarde van een overname?
De deal is rond. De strategie klopt. Dán is de overname geslaagd… toch? Lang niet altijd! Want hoe zit het met IT?
Veel bedrijven zie...
 Ga naar Hoe waarborgt een goede IT-aanpak de waarde van een overname?
Blogpost
/ 24-4-2026
Van informatiechaos naar grip op kennis in je organisatie
In veel organisaties gaat dagelijks tijd verloren door informatiechaos en versnipperde kennis. In deze blog lees je hoe je grip krijgt op kennismanage...
 Ga naar Van informatiechaos naar grip op kennis in je organisatie
Blogpost
/ 23-4-2026
Hoe zorg je dat je zorginstelling succesvol is met business intelligence?
Van datastroom naar stuurinformatie: grip op verspreide zorgdata
Zorgorganisaties werken met tientallen systemen die elk hun eigen data bijhouden,...
 Ga naar Hoe zorg je dat je zorginstelling succesvol is met business intelligence?